I know Mom is working on some Easter Tussy Mussy's so those should be available next week!
Thursday, March 05, 2015
Spring Is Just Around The Corner!
Well at least I'd like to think it is! I just listed the newest Spring items that Mom and I have been working on. Everything is in my Etsy shop now:
I know Mom is working on some Easter Tussy Mussy's so those should be available next week!
Tuesday, March 03, 2015
Crazy Quilt Wall Hanging
I've had a few guesses here and over at Facebook on my current project. I asked the other day for guesses as to what the focal point will be. So far, no one has the correct answer:
It's one of my absolute, most favorite themes to do! Come on ya'll, I've done tons of them!!!!
Does this photo give you a hint? I usually use some type of fancy yarn, in this case, it will be this gorgeous Sari Ribbon:
Send me your guesses! I'm sure someone will figure it out now! PS - if you look closely in my sidebar, you might find the answer!
Sunday, March 01, 2015
Hand Dyed Silk Ribbon
I spent about 3 hours this morning hand dying 50 yards of 7MM Silk Ribbon:
I was out of pinks all together and running quite low on greens and blues so that's what I focused on for this batch. In a couple of weeks, I'll order another 50 yards and do some more muted colors.
I use Rit dye to do my silk ribbon. It's inexpensive, easy to find in stores and works nicely. Here is a tutorial for dying Silk Ribbon with Rit Dye.
In other news, I finished up the stitching on my Crazy Quilt Bird Pillow:
It just screams Spring doesn't it? I want to get this sewn together sometime this week.
And finally, this is my next project:
This will be a wall hanging. If you look closely, you should be able to see the point at the bottom. Just follow the basting stitches.
The rose is not ironed down yet. It's a Broiderie Perse applique but I haven't decided on where it will go yet. This piece will have a focal point theme so where the rose goes will depend on how the focal point comes out.
Does anyone want to guess the theme? Leave me your guesses in the comments!
Labels:
applique,
bird pillow,
broiderie perse,
crazy quilting,
dying silk ribbon,
hand dyed silk ribbon,
Rit dye
Thursday, February 26, 2015
Shibori Ribbon Easy Tutorial
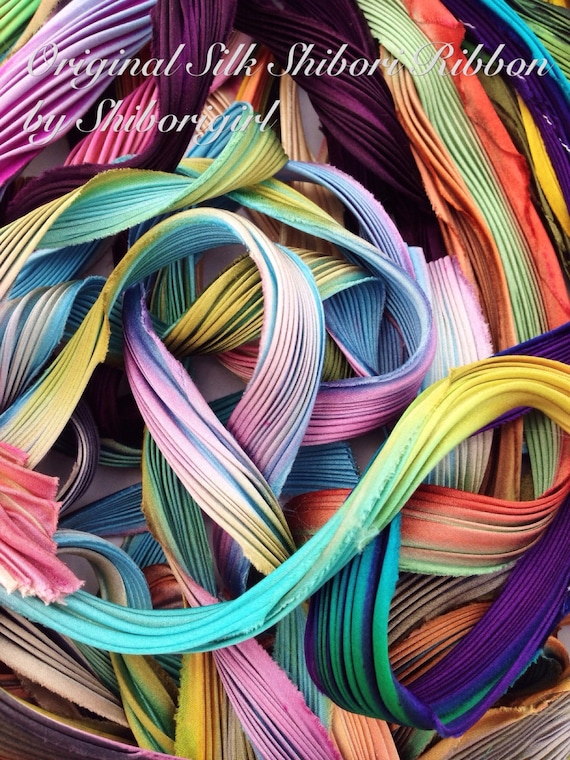
What is Shibori Ribbon? It's a strip of silk fabric that is twisted and pleated during the dying process to create a wonderful fabric embellishment that can be used in jewerly making and textile art and in this case, the elegant art of Victorian Crazy Quilting.
Created and manufactured by Shibori Girl, this gorgeous silk ribbon is available in a vast array of colors.
There are several online shops that carry the full line of Shibori Silk Ribbon but for Crazy Quilting, I recommend a scrap bag with a variety of shorter pieces. These scrap bags are available from Shibori Girl Studios on Etsy.
So what do you do with Shibori Ribbon? Let's get started.
Step 1: Because Shibori Ribbon is made of silk and pleated, it's very fluid and reflective. It can add movement to your crazy quilt block. It adds texture and light and of course, color! Determine where you want your ribbon on your block. In my example, I wanted the ends sewn into the seams. I started by pinching one end of the ribbon together and sewing the end down so that when I put this piece together, the ribbon will be sewn into the seam. It's just a matter of tacking it down. I used a fine silk thread by YLI for hand sewing:
Step 2: Fan the pleats out a bit and tack the edge down along one side. You'll want to tuck the raw edge under as you tack it down with tiny stitches.
As you can see in the photo below, I sort of "pinched" it in the center and then fanned it out again near the bottom. Again, I want both ends sewn into the seam when I put this project together.
So continue to tack your ribbon down along the other edge until you're satisfied that your shibori ribbon is secure. You don't need to a lot of tack stitches. Just a few.
Step 3: I like to use some sort of a focal point embellishment. In my example, I used a round pink bead and then added "petals" with smaller bicone beads. You can use buttons, a piece of vintage jewelry or anything else you like.
Step 4: Ya'll know me, I love beads!!! I used a pink bead mix and trailed beads from the pink flower outward in the "valleys" of the pleats, following the flow of the Shibori ribbon. You don't want to completely cover up your ribbon. Make sure you can see the ribbon through your bead trails.
Step 5: For a little added interest, I sewed on a few little hand dyed lace daisies with a bead in the center. Just a couple scattered here and there.
And that's all there is to it! It's very simple and adds so much interest to a crazy quilt project.
Of course, this isn't the one and only way to work with Shibori Ribbon. As I use it on upcoming projects, I will share more technique tutorials but this one is a simple and good way to get started using it.
I still have some stitching to do on this block so I'll post another update on it over the weekend. For now, I'm off to sew up a block for my next project.
Created and manufactured by Shibori Girl, this gorgeous silk ribbon is available in a vast array of colors.
There are several online shops that carry the full line of Shibori Silk Ribbon but for Crazy Quilting, I recommend a scrap bag with a variety of shorter pieces. These scrap bags are available from Shibori Girl Studios on Etsy.
So what do you do with Shibori Ribbon? Let's get started.
Step 1: Because Shibori Ribbon is made of silk and pleated, it's very fluid and reflective. It can add movement to your crazy quilt block. It adds texture and light and of course, color! Determine where you want your ribbon on your block. In my example, I wanted the ends sewn into the seams. I started by pinching one end of the ribbon together and sewing the end down so that when I put this piece together, the ribbon will be sewn into the seam. It's just a matter of tacking it down. I used a fine silk thread by YLI for hand sewing:
Step 2: Fan the pleats out a bit and tack the edge down along one side. You'll want to tuck the raw edge under as you tack it down with tiny stitches.
As you can see in the photo below, I sort of "pinched" it in the center and then fanned it out again near the bottom. Again, I want both ends sewn into the seam when I put this project together.
So continue to tack your ribbon down along the other edge until you're satisfied that your shibori ribbon is secure. You don't need to a lot of tack stitches. Just a few.
Step 3: I like to use some sort of a focal point embellishment. In my example, I used a round pink bead and then added "petals" with smaller bicone beads. You can use buttons, a piece of vintage jewelry or anything else you like.
Step 4: Ya'll know me, I love beads!!! I used a pink bead mix and trailed beads from the pink flower outward in the "valleys" of the pleats, following the flow of the Shibori ribbon. You don't want to completely cover up your ribbon. Make sure you can see the ribbon through your bead trails.
And that's all there is to it! It's very simple and adds so much interest to a crazy quilt project.
Of course, this isn't the one and only way to work with Shibori Ribbon. As I use it on upcoming projects, I will share more technique tutorials but this one is a simple and good way to get started using it.
I still have some stitching to do on this block so I'll post another update on it over the weekend. For now, I'm off to sew up a block for my next project.
Labels:
crazy quilting,
easy shibori ribbon tutorial,
shibori girl,
shibori ribbon,
what is shibori ribbon
Tuesday, February 24, 2015
Bird Pillow Update
I have a quick little update today on my current project. This will be a pillow when I complete it:
The next step on this will be to add the Shibori ribbon and embellish that. I will take photos as I go along and put together a nice and easy tutorial for you.
In the meantime, one of our very own dear Crazy Quilters is in need of some financial assistance. Cathy Kizerian was kind enough to set up a GoFundMe fundraiser to help Viv with the funeral costs for her dear husband Eddie. If you're interested in helping Viv, please click here.
Labels:
bird pillow,
crazy quilters,
crazy quilting
Subscribe to:
Comments (Atom)


