Cross Stitch Patterns by designer Pamela Kellogg of Kitty And Me Designs

The Blog Of Cross Stitch Designer Pamela Kellogg
Kitty And Me Designs

Add This To

Kitty And Me Designs

Celebrating 35 years of Needlework!!!!

Saturday, March 28, 2015

Midwest Flea Market Schedule 2015

I was asked if I would post the Midwest Flea Market schedule for 2015.  This is for the Chicago, Milwaukee and Rockford area.  These are the Antique Flea Markets that Scott and I go to.

Graylake, Illinois Fairgrounds:

April 11th & 12th
May 9th & 10th
May 23rd Late Night Flea Market
June 20th & 21 (weekend change for only this year)
July 11th & 12th
August 8th & 9th
September 12th & 13th
October 10th & 11th
November 7th & 8th
December 12th & 13th Show Hours: Saturday 10am to 5pm and Sunday 9am to 3pm / $7


Kane County, Illinois Fairgrounds:

April 11 & 12th  
May 2nd & 3rd
June 6th & 7th
July 4th & 5th
August 1st & 2nd 
September 5th & 6th
October 3rd & 4th
November Show-   *Oct 31st & Nov 1st
December 5th and 6th
First 2016 show -- March 5th and 6th

Admission $5.00 per day Adults


Elkhorn Wisconsin Fairgrounds:

May 17
June 28
August 9
September 27
Admission $5.00 per person 


Wilmot Wisconsin Wilmot Mountain:


SEASON EIGHT GRAND OPENING: April 12, 2015!!! 
Open every Sunday: 7:00am-3:00pm
                                                        Admission $1.00 per person

Thursday, March 26, 2015

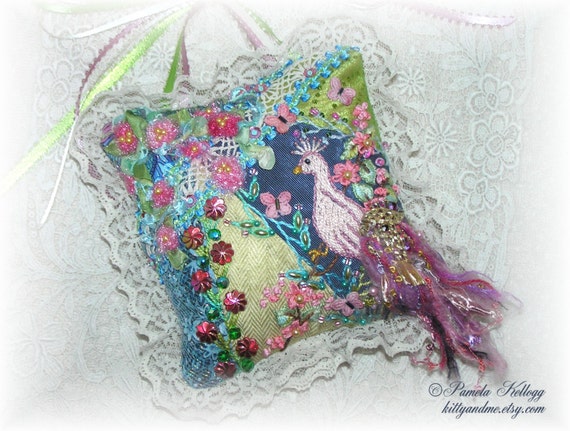
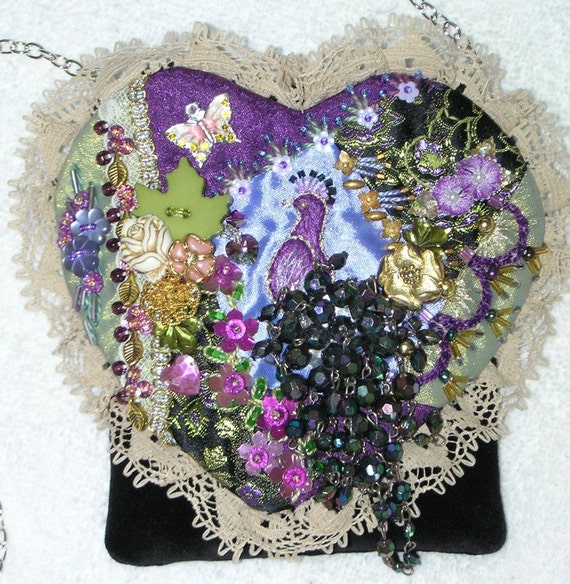
Crazy Quilt Peacocks

I was asked if I could post photos of all the Peacock Crazy Quilt Pieces I did over the years.

This one was a lace peacock:

And these are the ones with the fancy tails:

Last but not least is this piece:

I stitched the peacock back in the 1980's.  About 2 years ago, I decided to make it into a wall hanging with crazy quilting on either side.  I just need to put it together which I'm planning on doing this Summer.

So, I think that's all of them!  At least so far!


Tuesday, March 24, 2015

Peacock Wall Hanging Completed

The Peacock Wall Hanging is complete!  I always do the peacock's tail last.  I start by adding a piece of vintage jewelry to the top of the tail.  In this case, I used a pair of vintage earrings:

The next step is to "shape" the tail.  It's a matter of getting the fancy yarn to lay right:


The next step is to add the eyes to the feathers.  I used some large round gold sequins with a smaller pink flower sequin in the center:

Finally, the bottom of the tail gets a little bit of a trim:


So this is complete and ready to go!  My client plans to do the finishing herself so I'll ask her if she would send me a photo when it's hanging on her wall.

Tuesday, March 10, 2015

Shibori Ribbon Fan Tutorial

For today, I thought I'd share the tutorial for the Shibori Ribbon Fan that I did on my Peacock Wall Hanging project.

There's so many things you can do with Shibori Ribbon and this is a very easy embellishment for your crazy quilt blocks.

First, you'll need your piece of Shibori ribbon and you'll need to decide where you want to place it.

In the case of my example, I tucked one end underneath the lace, near the seam on the top.  You can tuck your ribbon into any seam on your block or underneath a piece of lace.


Once you have one end tacked down with a few stitches, you'll want to "poof" the top 3/4's of the ribbon.  Look closely at the above photo.  I pinched the ribbon where I wanted the fan to start.

I took a few "tack" stitches where I had the ribbon pinched to hold it in place.  Also, tack the edges of the ribbon down to hold the "poof" in place.

The next step is to fan out the bottom of the ribbon.  Do one side first, tacking along the edge with a few stitches to hold it in place.

Do the same on the other side of the fan.

As a focal point on the "pinch", I added a little hand painted rose lace applique.  You can use anything you like.  A ribbon bow, buttons or a piece of vintage jewelry.  A little focal point brings the eye to the Shibori ribbon.  Just be sure not to crush the little "poof" in your ribbon.


Finally, I did some beading along the edges of the poof as well as the fan.

Again, this is a really easy way to add some Shibori to your crazy quilting!  Give it a try and send me some photos for Crazy Quilt Quarterly magazine.  I'll be starting on the Fall issue soon!

And here is an update of the overall piece:

I started working on the Broiderie Perse Rose applique this morning.  I still have a way to go on that.

Click on the photos to see them up close!


Monday, March 09, 2015

Peacock Wall Hanging Update

Just a quick post for today everyone.  I thought you would enjoy seeing an update on my Peacock Wall Hanging:

The tail is attached by not "arranged" yet.  I will show you how I do that when I get to that point.

Tomorrow I will post a tutorial on how to do the Shibori Ribbon like I did on this piece.  I'm about ready to get off the computer for the day so I think the next thing I'll do is to iron down the Broiderie Perse applique rose and get started on stitching that. 

You can click on the photo to see it up close.

Thursday, March 05, 2015

It'll Be A Peacock!

For those of you who guessed a peacock for the focal point on this wall hanging, you are correct!  Unfortunately, I haven't gotten that far with it yet:

Here is a closeup of the floral spray:

And closeups of the seam embroidery:


I did not embroidery the fabric in the above photo.  I'm fortunate enough to be give outdated fabric sample books from a local decorating store.  Some of these fabrics are so incredibly beautiful!  The floral fabric in this photo is from one of the sample books.  Some of these fabrics sell for $150 - $300 per yard.  Yikes!!!  I couldn't even afford a 1/8 yard piece!

But I'm so grateful that the store owner gives me the sample books for my crazy quilting.  How else could I have some of these wonderful fabrics to use in my work!


Spring Is Just Around The Corner!

Well at least I'd like to think it is!  I just listed the newest Spring items that Mom and I have been working on.  Everything is in my Etsy shop now:


I know Mom is working on some Easter Tussy Mussy's so those should be available next week!

Tuesday, March 03, 2015

Crazy Quilt Wall Hanging

I've had a few guesses here and over at Facebook on my current project.  I asked the other day for guesses as to what the focal point will be.  So far, no one has the correct answer:

It's one of my absolute, most favorite themes to do!  Come on ya'll, I've done tons of them!!!!

Does this photo give you a hint?  I usually use some type of fancy yarn, in this case, it will be this gorgeous Sari Ribbon:

Send me your guesses!  I'm sure someone will figure it out now!  PS - if you look closely in my sidebar, you might find the answer!


Sunday, March 01, 2015

Hand Dyed Silk Ribbon

I spent about 3 hours this morning hand dying 50 yards of 7MM Silk Ribbon:

I was out of pinks all together and running quite low on greens and blues so that's what I focused on for this batch.  In a couple of weeks, I'll order another 50 yards and do some more muted colors.

I use Rit dye to do my silk ribbon.  It's inexpensive, easy to find in stores and works nicely.  Here is a tutorial for dying Silk Ribbon with Rit Dye.

In other news, I finished up the stitching on my Crazy Quilt Bird Pillow:

It just screams Spring doesn't it?  I want to get this sewn together sometime this week.

And finally, this is my next project:

This will be a wall hanging.  If you look closely, you should be able to see the point at the bottom.  Just follow the basting stitches.

The rose is not ironed down yet.  It's a Broiderie Perse applique but I haven't decided on where it will go yet.  This piece will have a focal point theme so where the rose goes will depend on how the focal point comes out. 

Does anyone want to guess the theme?  Leave me your guesses in the comments!


Related Posts with Thumbnails